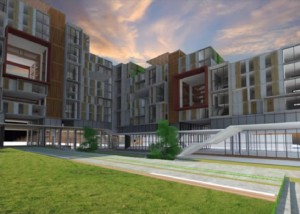
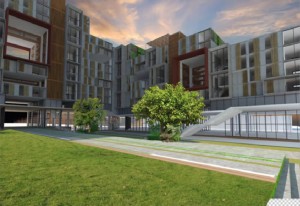
In this tutorial you can learn how to post process a 3D render in Photoshop.
Keep in mind that you will need a lot of stock images to make this kind of artworks. It’s useful to know that you will make your work easier in Photoshop if you add as many details as you can in the 3D software, even if image is in low resolution.
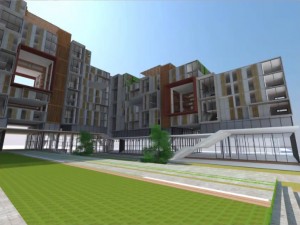 Initial image rendered in 3D software.
The first step is to clear background from your image using alpha channel.
- When you export a 3D render in programs like 3DS Max or Revit you have the option to export the alpha channel, which is black & white image, and you will use it to make the mask to mask your image.
- Open both image and alpha channel in Photoshop. Copy alpha channel over original image. You now have 2 layers.
- You will use alpha channel as layer mask to remove the sky and background.
- Double-click on the original layer and click OK to unlock it and convert from Background layer to Layer 0. Add layer mask to Layer 0.
- Click alpha channel layer and press Ctrl+C to copy its content.
- Press Alt key and click on the layer mask to activate it. Press Ctrl+V to paste alpha channel. Now press again Alt key and click on the layer mask to deactivate it.
- Now you can delete alpha channel layer.
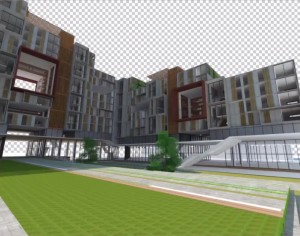 Background was cleared using alpha channel.
The next step is to correct the perspective, if your render has distortion (buildings are not straight).
- Convert layer to Smart Object (right click – Convert to Smart Object).
- Go to Filter – Lens Correction. Go to Custom Tab.
- Play with Vertical and Horizontal Perspective to correct perspective and press OK.
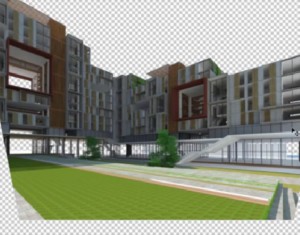 Distortion was corrected using Lens Correction filter.
Now you need to start to think what kind of mood you want for your image. In this case author creates some sort of sunset fill. You need a lot of stock images and elements to add to your image. Note: When you search for stock images you need to find images that have the right lighting and the right perspective.
- Copy sky to your image in a new layer beneath original layer. Scale sky layer to appropriate size.
- Copy grass image to a new layer. Add layer mask to grass layer. In the original layer, select grass using Magnetic Lasso Tool (or any other Selection Tool). Invert selection (Ctrl+I) and fill layer mask with black.
- Unlock mask to be able to move grass layer without mask. Scale it to appropriate size. Transform it with lighting and perspective in mind.
The next thing is to add some trees, over your existing trees in the render (that are probably in low resolution). Deviantart.com is a good place to find stock images. Search for high resolution transparent PNG files, because you don’t need to spend time to cut them.
- Copy your tree to a new layer. If you will using it several times, you can convert it to Smart Object to preserve quality, editing capabilities and original size of it.
- Unlock mask to be able to move grass layer without mask. Scale it to appropriate size. Transform it with lighting and perspective in mind.
- The next thing is to add some trees, over your existing trees in the render (that are probably in low resolution). Deviantart.com is a good place to find stock images. Search for high resolution transparent PNG files, becouse you don’t need to spend time to cut them.
- Copy your tree to new layer. If you will using it several times, you can convert it to Smart Object to preserve editing capabilities and original size of it. Scale it to appropriate size.
- Take into account light angle, use Flip Horizontally if you need (Ctrl+T – right click – Flip Horizontal). To make light changes go to Blending Options – Gradient Overlay. Change Angle and set Blend Mode to Soft Light. Set Opacity as you want.
- Use layer mask to hide some parts of your elements that you insert.
When you add elements (railings, cars, benches, lightposts, humans) into your image, sometimes is hard to tell how big or how small should something be. In that case you need Perspective Grid. Note: When you insert elements into your image, it’s recommended to convert them to Smart Object, so you can change size of it without losing quality.
- Create new Layer and name it Guide.
- Go to Filter – Vanishing Point. Choose Create Plane Tool. Draw plane that will be guide for your Perspective. Click Settings and Commands for Vanishing Point – Render Grids to Photoshop. Click OK. Now you have perspective auxiliary lines in layer Guide.
- When you adjust elements to perspective auxiliary lines, use Transform Tools (select Layer – Ctrl+T – right click on Transform Controls – choose Transform Tools, like Perspective or Distort.
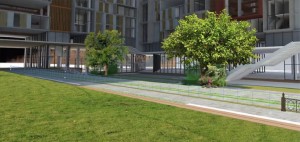 Grid lines rendered to Photoshop.
Some tips:
- When you start you need to have main light source somewhere, so that way you can make everything consistent with that light source.
- Search for elements (stock images) that have same perspective (or very close) as your image, because when you transform elements that have different perspective it will look weird.
- The more elements and the more details you add to your scene, the better.
- Use Screen Blending Mode for making glows of light. Use Color Dodge Blending Mode with dark tones.
- Use Gradient Map with Screen Blending Mode to change mood. Go to Layer – New Adjustment Layer – Gradient Map. Set Gradient in the Gradient Editor. Use Gradient Tool to create gradient in the image.
- Use Shift+Ctrl+Alt+E to create another layer from what you see on the screen (combines everything into a new layer).
- Add vignetting using Lighting Effects filter (Filter – Render – Lighting Effects).
- Use Smart Filters. Any filter applied to a Smart Object is a Smart Filter.
- Create Layer Groups (layer folders) to organize your layers.
Source: PSD Box
