The very first step when you start learning a software is to get familiar with its user interface (UI). Many Revit beginner users and even experienced users are not familiar with Revit user interface or are confused when they need to find a tool. It is important for an Revit user to know which tools Revit provide, how tools are organized in Revit and how to maximize efficiency.
Revit has a similar interface as other Autodesk applications. The most important parts are: the Ribbon at the top, as it provides access to a wide range of tools organized into various tabs and groups; and the Project Browser palette, as it provides a hierarchical view of the building elements and components within the current project.
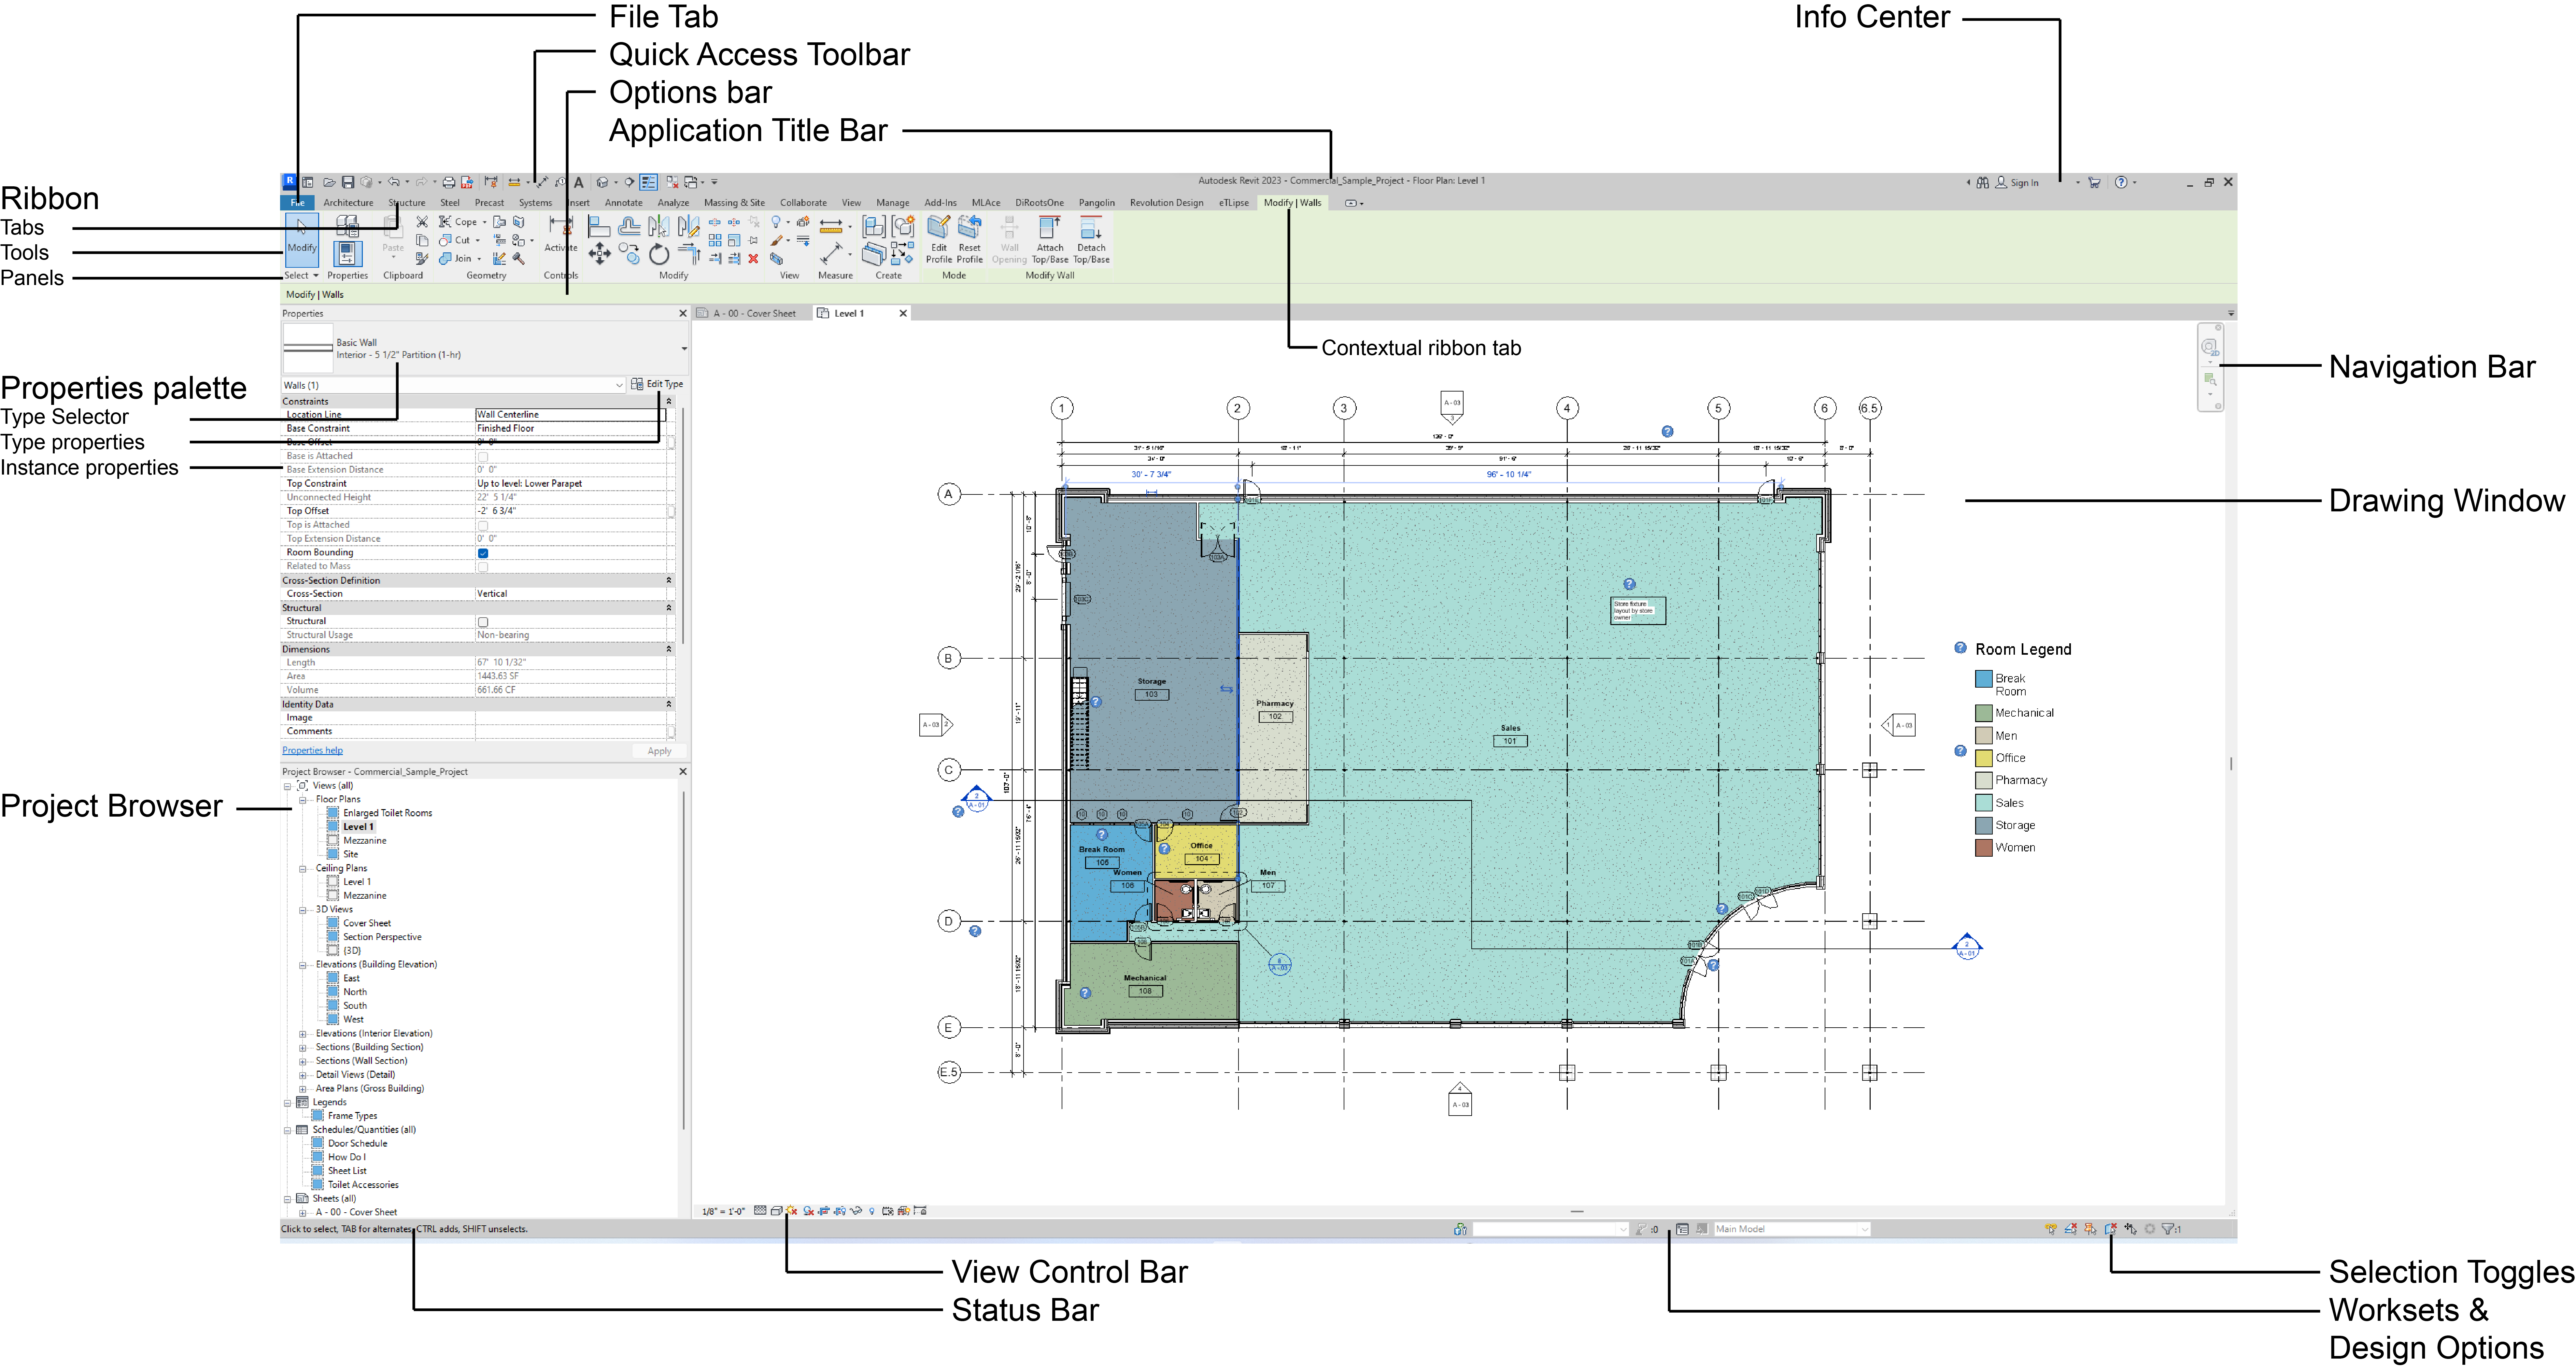 Revit’s user interface
The main components of Revit’s user interface include:
- Start screen. To get started you can choose to open an existing project model or a family, or create new ones. Also the Start screen displays recently used files.
- File Tab (application menu). The File tab is located in the upper left corner of the screen and provides access to file operations, such as opening, saving, exporting and printing files, and Revit’s options. This tab has similar functionality as File tab in the other applications.
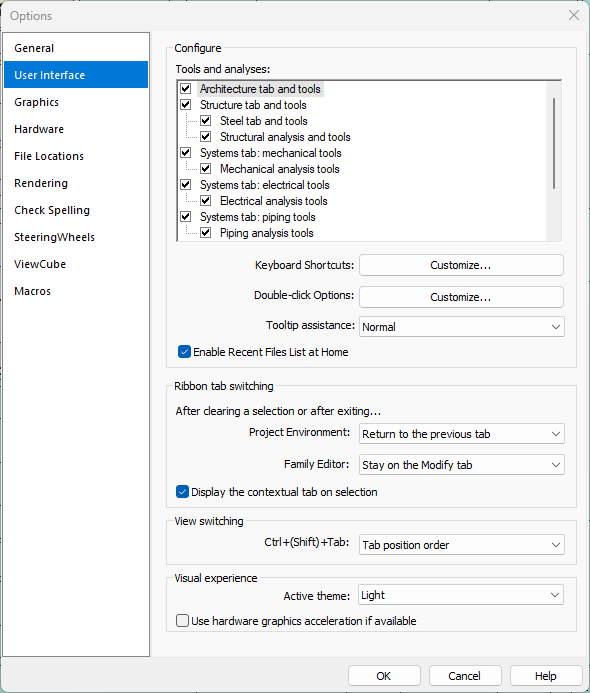
- Options dialog. The Options dialog is a settings menu where you can customize various aspects of Revit’s behavior and functionality such as user interface, graphics, file locations, etc.
- Quick Access Toolbar. The Quick Access Toolbar is a customizable toolbar located above the ribbon that contains frequently used commands and functions that can be accessed with a single click. Customize the Quick Access Toolbar to include the tools that you use the most. Just right-click a tool and select “Add to Quick Access Toolbar”.
- Ribbon. This is the main part of your Revit interface. The ribbon contains the tools you need to effectively create, edit, and manage building information models. The tools are grouped by task and by discipline. The Modify tab is a contextual tab that appears to show object-specific tools when you select an element. The Ribbon is highly customizable, allowing users to tailor the interface to their specific needs and workflows. In order to customize the Ribbon use go to the Options dialog, User Interface tab.
- Tabs. The Ribbon Tabs are the categories that include different commands and tools. There are categories that are focused on single discipline (architecture, structure, MEP) and there are categories that include general tools for all disciplines. There are built-in Revit ribbon tabs, and there can be ribbon tabs added when you install plugins. A contextual ribbon tab provides tools relevant to the selected object or current action.
- Panels. Commands and tools in ribbon tabs are organized into panels. You can hide panel titles by double-click -> deselect “Show Panel Titles”.
- Options Bar. The Options bar is a contextual toolbar that appears at the top of the Revit interface when you select certain tools or commands. It provides quick access to settings and options related to the current task you are performing in Revit. The contents of the Options bar vary depending on the tool or command you are using. The Options bar typically contains buttons, drop-down menus, and fields for inputting values. Contextual areas (Options bar and contextual ribbon tab) are indicated in green.
- Properties Palette. The Properties Palette is usually located on the left side of the screen and displays information and settings for the currently selected element. In the Properties palette you can modify properties of the selected element.
- Type Selector and Type properties. Use Type Selector to quickly switch between different types of a specific element in your model. Use Edit Type button to modify the properties and type parameters of specific element types.
- Instance properties. The properties that apply to individual instances of elements. Unlike type parameters that you access through Edit Type command, these properties are instance parameters that you can use to make quick changes to individual elements. The instance properties that are available in the Properties palette vary depending on the type of element that you have selected.
- Project Browser. The Project Browser displays the hierarchical structure of your Revit model, including all of the views, sheets, schedules, families, groups, and other elements that are included in your project. The Project Browser allows you to navigate and manage the elements in your project. The elements are arranged into several categories and you can create a custom organization of elements to make it easier to navigate and work in your model. You can perform a variety of other tasks, such as creating new views, sheets, schedules, family types, etc.
- Info Center. Quickly access a variety of helpful resources related to using the software. Also the Info Center provides a way to manage your software license and activation status. In order to take advantage of Info Center you need the Internet connection. The Info Center is typically located at the top-right of the Revit user interface.
- Application Title Bar. The bar at the very top of the Revit user interface that displays the information related to the software and the current file. It displays the version of the software, the name of the current file, and the name of the current view.
- Navigation Bar. The Navigation Bar provides several important tools for navigating the model view, including zoom tools and navigation tools which vary depending on whether the current model view is 2D or 3D view. In 3D views Navigation Bar displays the View Cube for easier navigation in the model.
- Drawing Window. The large central area of the Revit user interface where you create and edit your building model. It’s the main workspace where you can switch between different types of views, such as floor plans, 3D views, and elevation views. You can also change the view settings, such as the display of elements, and use crop regions and section boxes to focus on specific areas of the model. Starting with Revit 2024 you can set dark theme for the user interface and set black color of the main window using Canvas Theme tool.
- View Control Bar. Quick access to various view-related tools and settings. The View Control Bar is typically located at the bottom of the Revit window, and it may contain different tools depending on the view that is currently active. You can change the scale, visual style and detail level, hide/isolate elements, etc.
- Status Bar. The Status Bar displays messages that provide helpful feedback on your actions and guide you through the Revit interface. By paying attention to the Status Bar messages, you can take appropriate actions every time and quickly identify potential issues or errors.
- Selection Toggles. Customize your selection preferences and control how elements are selected in the active view. These toggles are also available on ribbon at the beginning of any built-in ribbon tab (below the Modify tool).
- Worksets & Design Options. At the bottom of Revit window you can find Worksets toolset and Design Options toolset. Worksets enable multiple users to collaborate on a project; in order to use worksets you need to enable worksharing. Design Options allow users to explore different design alternatives within a single project file.