Whether you are a BIM manager or a BIM modeler you need to get very familiar with Revit’s Manage ribbon tab because it’s a crucial component of the software’s user interface. This article helps you with this task.
Revit’s Manage tab contains a wide range of tools and features that enable users to manage the various aspects of a project and ensure that the project is well-organized. These tools enables you to customize the project to your specific needs and requirements, and also to ensure consistency in your project.

Manage ribbon tab includes the following panels with the key features and tools:
- Project Settings. This toolset provides access to various important settings such as materials, object styles, project information, units, line styles, etc. Also from here you can manage parameters and access Transfer Project Standards tool.
- Material Browser. Create and manage materials for your projects. Materials can be applied to entire objects or to specific faces.
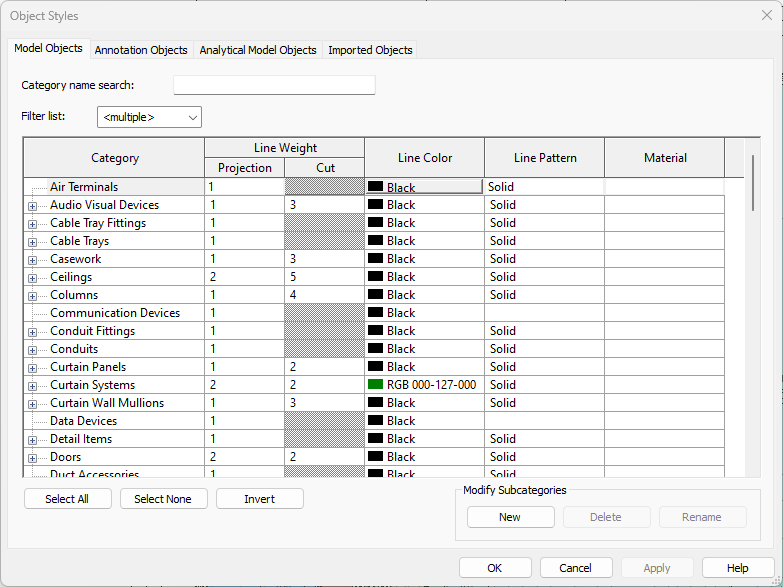
- Object Styles. Control the appearance of different types of elements in the project, such as walls, floors, and ceilings. These settings can be overridden in views.
- Project Information. Project Information is a special system family that allows users to manage and store important project-specific information, such as the project name, number, location, client information, and project status. The information entered into the Project Information family can be used on drawing sheets and schedules.
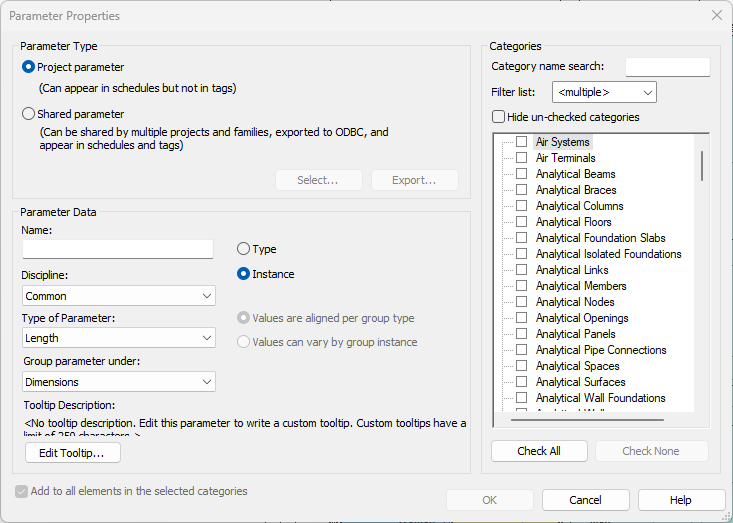
- Project and Shared Parameters. Create project parameters that you can use for scheduling; also create shared parameters, powerful custom parameters that can be shared across projects and families, and can be used for scheduling and tagging.
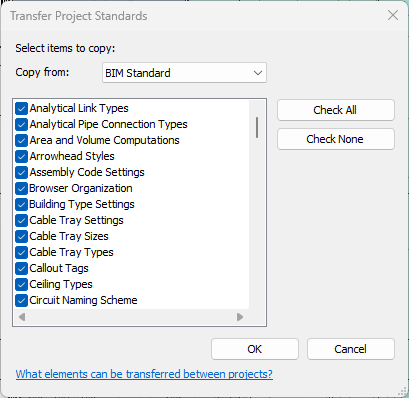
- Transfer Project Standards. This tool excludes the need to recreate settings from scratch in each new project. It enables you to streamline the project workflow and ensure consistency across multiple projects.
- Purge Unused. Remove unused elements from your Revit project to reduce file size and improve performance. The Purge Unused tool should be used with caution, as it can permanently remove elements that may still be needed in the project. Before using the tool, it’s recommended that you review the list of elements to be purged and make sure you don’t need any of them. Additionally, it’s a good practice to make a backup of the project file before using the tool.
- Project Units. Set up the units and precision used within your Revit project. Both Project Units tool and Metric/Imperial templates are important for setting up the correct units for your Revit project. The Metric/Imperial templates are pre-configured project files that include predefined units, settings, and content based on the metric or imperial measurement system.
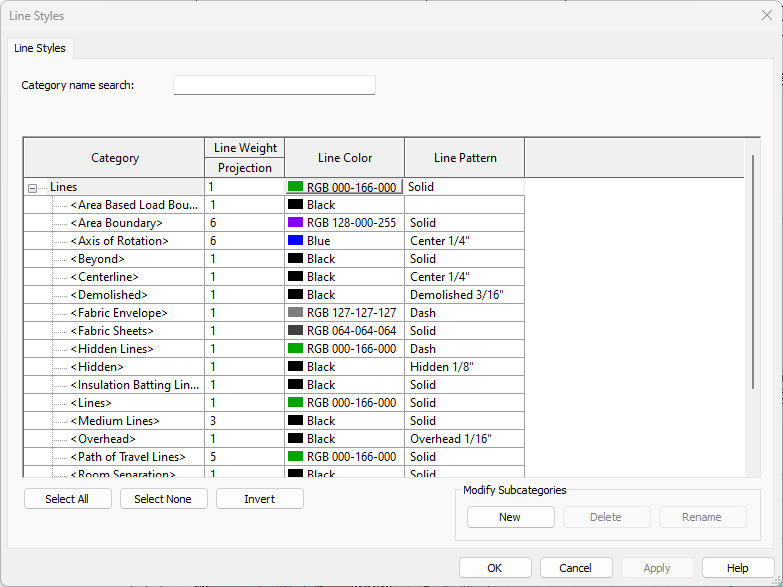
- Line Styles, Line Weights, Line Patterns. Control the appearance of lines in views. Use Line Styles to define the appearance of a line in terms of its weight, color, and pattern. These important settings can be transferred from other projects or from a template.
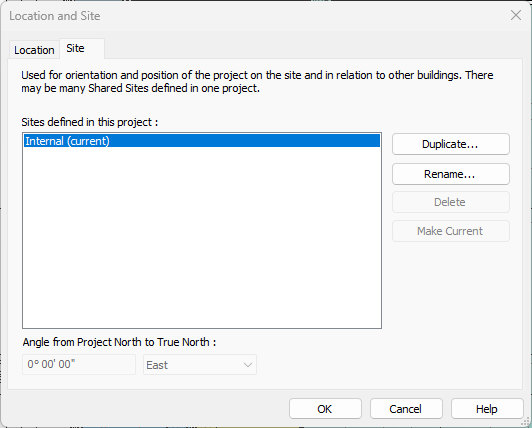
- Project Location. Specify the geographic location and orientation of your building project within the real world. This is important because it affects several aspects of the project, such as solar studies, shadow analysis, and energy analysis. Specifying coordinates and project/true north is also important when you link models.
- Design Options. Create and manage alternative design options in order to explore and present different design variations.
- Generative Design. Generative Design is a software that was developed independently but it is integral part of Revit. You can use this AI tool to explore design alternatives and optimize building performance. Generate and evaluate design options using computational design methods of the Generative Design software. Define design goals, constraints, and optimization criteria, and then let the software generate and analyze multiple design options based on these input parameters.
- Manage Project. Use Manage Links dialog to link other Revit project files and external files including IFC files, CAD files, PDFs and other file types. This enables you to split complex models into multiple models and to reference data from other sources. Using Decal Types dialog you can manage decals, images that can be applied to a flat surface to represent a pattern or texture that you don’t need modeled in 3D. This panel also provides Starting View tool, that you can use to set view to display when you open model.
- Phasing. Manage and control the phasing of construction. This allows you to organize your project according to construction phases or stages, such as demolition, new construction, and renovation. You can also create and manage phasing filters, which are used to display elements in the project according to the phase they belong to. With phasing filters, you can create customized views and schedules that show only the elements that are relevant to a specific phase. With Graphic Overrides, you can also customize the graphical appearance of elements in your project according to their construction phase, which is useful for creating construction documentation that clearly shows the different stages of construction in your project. This graphical appearance can be overridden by other graphic settings in the project.
- Selection. You can create a Selection Set if you need to quickly select a group of elements. With Selection Sets, you can create named groups of selected elements, store them for future use, and recall them at any time. This can be particularly useful when you need to work with a specific set of elements repeatedly, or when you want to isolate a specific group of elements for editing or analysis.
- Inquiry. This panel contains commands that enables you to check ID (unique identifier) of selected element and to find element by ID in your model. The Warning dialog provides a list warnings, which are typically related to issues such as incorrect or conflicting geometry, incorrect use of parameters, or issues with model elements such as walls, floors, or doors. The warning displays the type of issue and the elements that are affected. It also includes an option to view more detailed information about the warning, including the element ID, the source of the warning, and potential solutions. It is very important to carefully resolve warnings as resolving can cause a mess and unexpected results in the model.
- Macros. Macros enables you to automate repetitive tasks in Revit, such as modifying properties of elements, creating or deleting elements, generating reports, and more. Macros are created using the Revit API (Application Programming Interface) and can be accessed through the Visual Basic Editor (VBE) in Revit. If not tested and executed properly, macros can potentially cause unintended consequences.
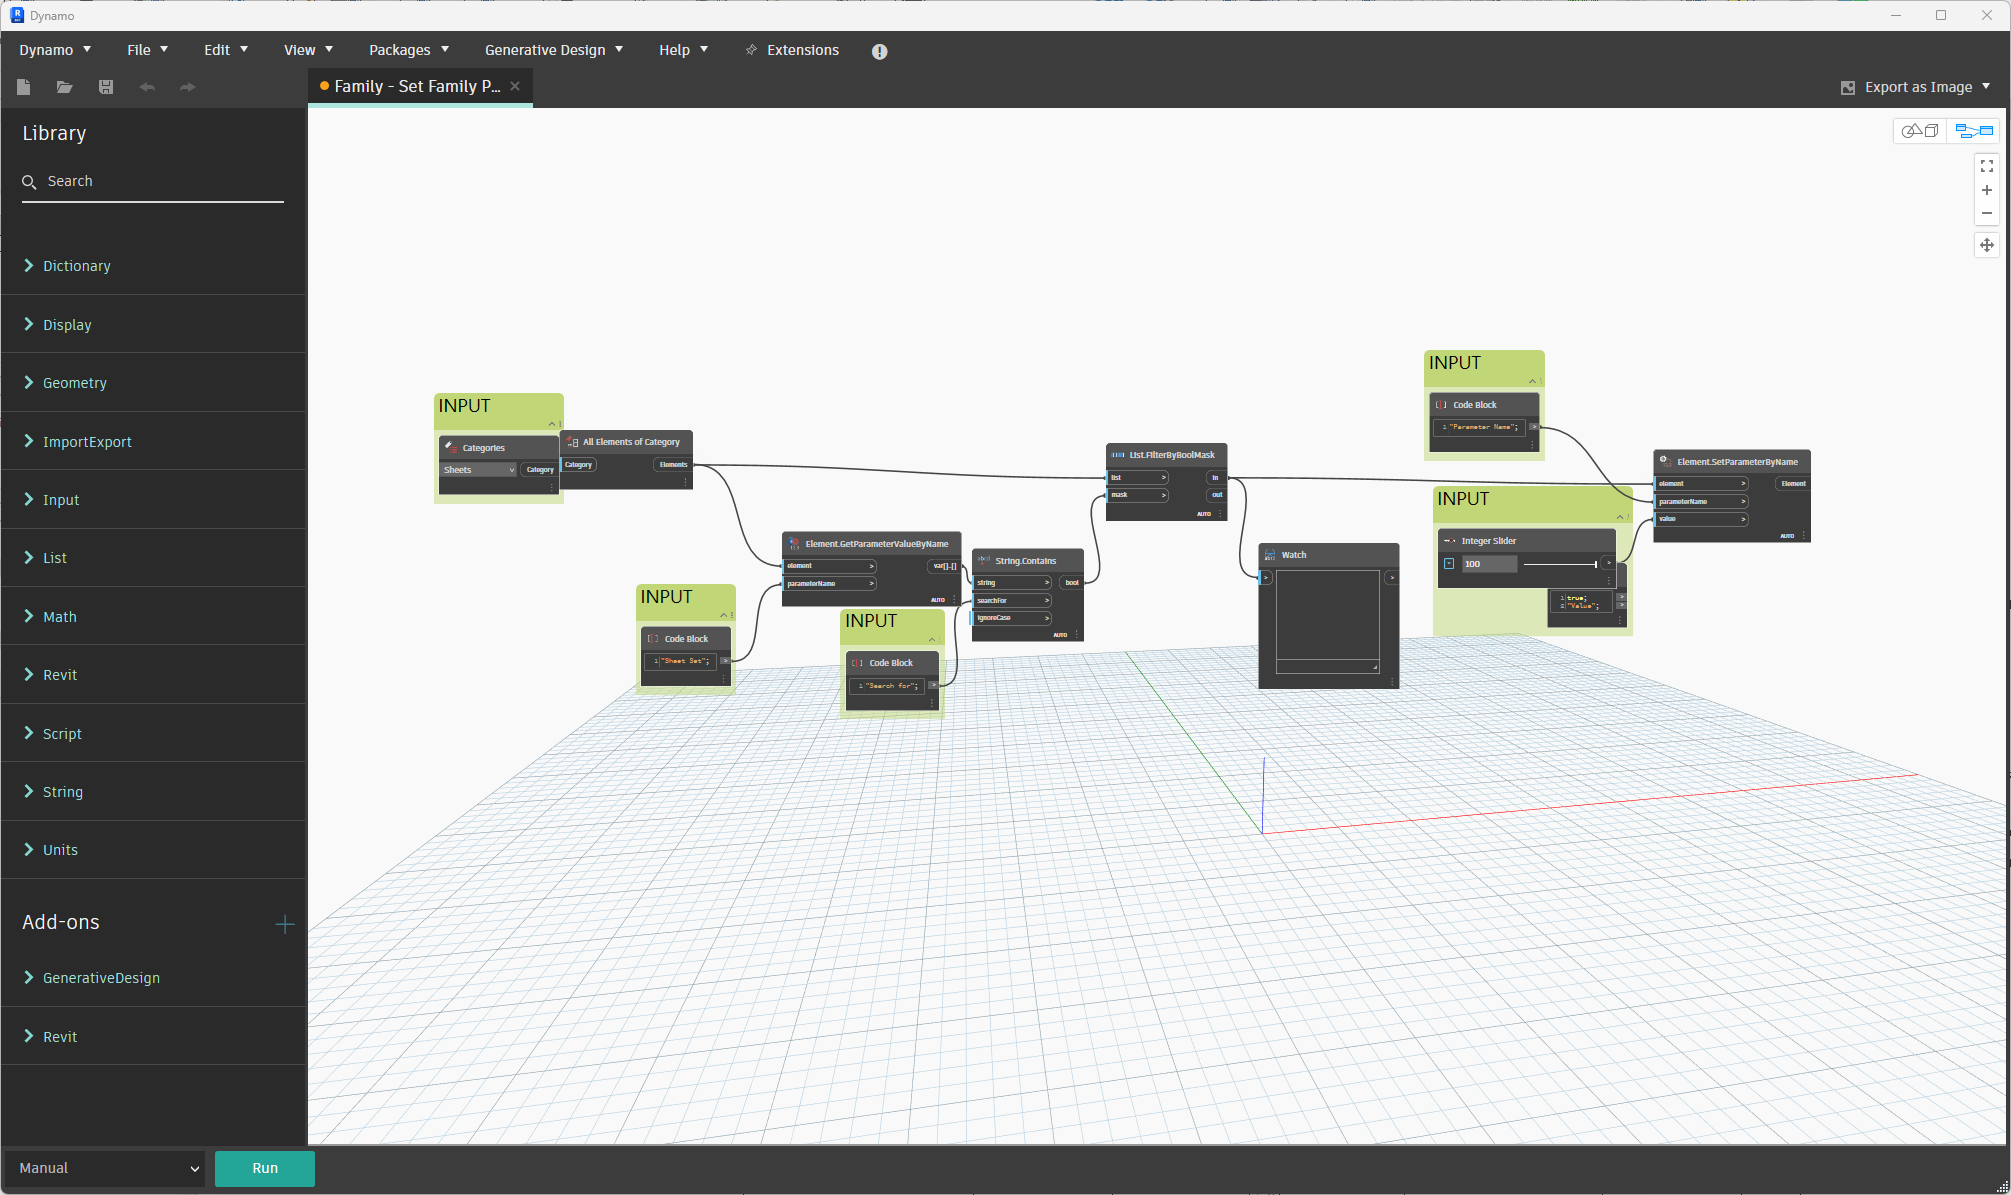
- Visual Programming. Similarly to Generative Design, Dynamo had its own development path but at the some point it became an integral part of Revit. Dynamo is visual programming tool similar to Grasshopper in Rhino; however while Grasshopper is mostly used for designing, Dynamo is mostly used for repetitive tasks. This means that Dynamos scripts can have similar functionality to Revit add-ins but it can be less stable. Use Dynamo Player when you just want to run scripts that are already tested in Dynamo visual programming environment.