The easiest way to upgrade a Revit central model together with its linked files is by using the e-Transmit tool, a built-in Revit function. The primary purpose of the e-Transmit tool is to archive models and prepare them for sharing, usually via file-sharing services. However, it can also be used to easily upgrade central Revit models with links to a higher version of Revit. While you can complete this task manually, it is a much more complex process, requiring you to open and upgrade each file individually, relink the upgraded links, and deal with a time-consuming, error-prone workflow – especially for large projects.
- Prepare your files. Ensure all models to be upgraded (central and linked) are accessible and saved in the same older version of Revit.
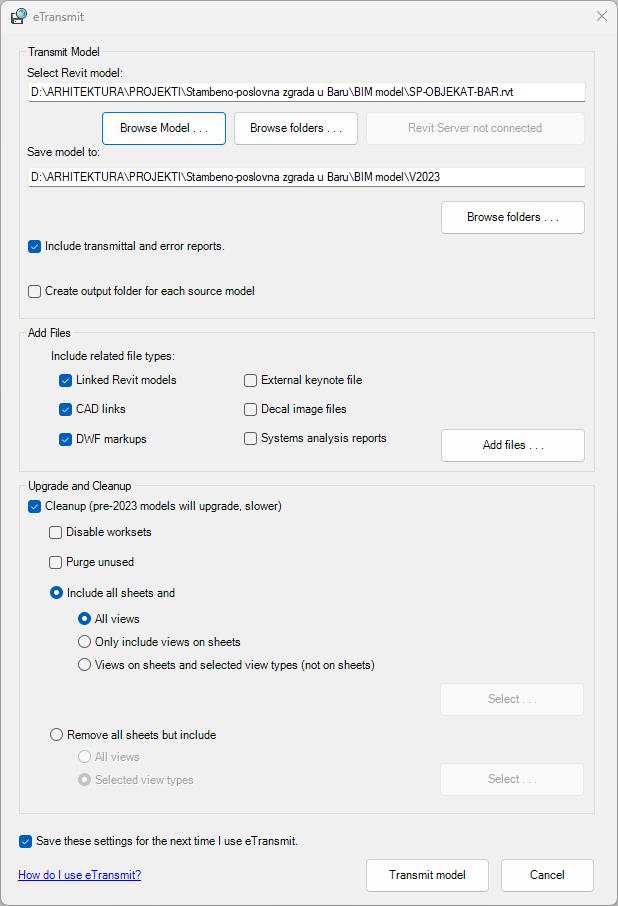
- Open e-Transmit. Close all open models in Revit. Then, go to the “Add-ins” tab and select “Transmit a Model” under e-Transmit.
- Set up the destination folder. Choose a folder where the upgraded files will be saved. e-Transmit will automatically create a subfolder for the files.

- Configure options.
- Select file types: Check the “Linked Revit models” and “CAD links” boxes, as well as any other relevant boxes based on your project needs.
- Upgrade files: Check the “Cleanup” box to upgrade files to the current Revit version.
- Preserve worksets: Ensure the “Disable worksets” box is unchecked to retain worksets for collaborative projects.
- Transmit the models. Click “Transmit Model” to upgrade the files. Revit will process the central model and all linked files together.
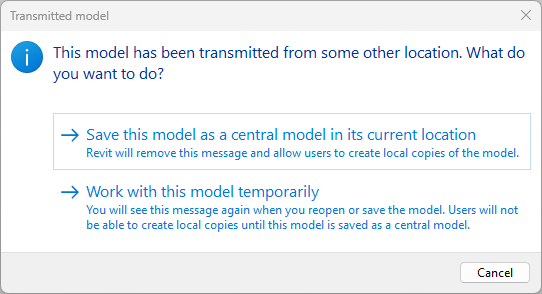
- Verify the upgrade. Open the upgraded central model in the newer Revit version. In the “Transmitted Model” dialog box, select the option “Save this model as a central model in its current location”. Check if the links are intact and ensure they are using relative paths.
