When you submit documentation from Revit usually you also submit Revit models. Of course, it depends on scope of work and it should be specified in the BEP do you submit BIM models. In general there are two workflows for preparing models for submitting: you can use Revit’s native eTransmit function, or you can manually detach models.
When you export PDFs and DWGs it is mostly related to your Revit sheets. But when you prepare your Revit models for submission you should know for which purpose you send models. Is it for your regular coordination with the other project stakeholders? For structural designers or MEP designers? For clash detection? Is it a submission to the client? For example, if you send models for clash detection you can probably fully purge the models as the geometry is the only what is needed.
- eTransmit. eTransmit is a Revit’s native function that prepares Revit models for transmission. In order to use this command, all Revit models should be closed. Open Revit, and click left arrow in the upper left corner of your Revit window. This redirects you from Recent Files screen to empty screen with ribbon. Navigate to Add-Ins -> Transmit a model. In the eTransmit dialog box you should select a model that you send, and folder where you want to save model and its dependent files (linked files). You can check if you want to include linked Revit models and CAD links in transmission. If you linked only DWG files as underlays you could probably leave CAD links unchecked.
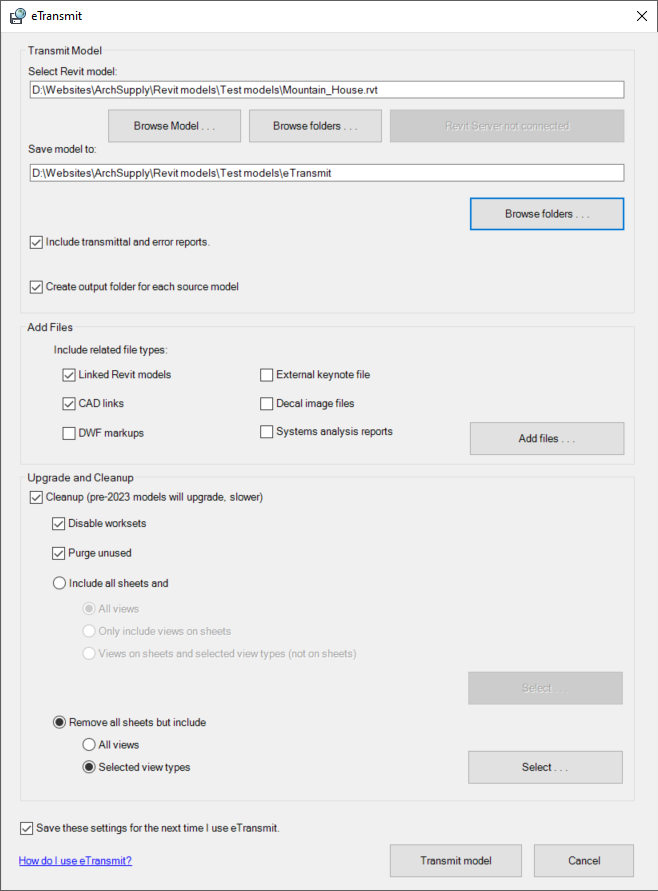
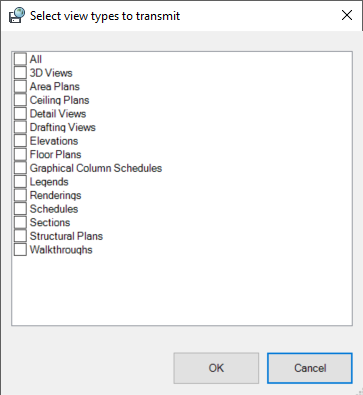
- Cleanup. eTransmit can also clean up your transmitted models for you. You just need to check Cleanup, and choose if you want to include or remove sheets and selected view types (floor plans, ceiling plans, sections, elevations, 3D views, legends, schedules, etc.). If you transmit workshared model you can check “Disable worksets” if transmitted model will not be workshared central model (it’s mostly the case). If you check “Purge unused” the transmitted model will be purged in a way as if you used Revit’s “Purge Unused” function.
- Model size. Transmitted models are usually significantly smaller in size but transmission process can take a long time especially if you transmit a large number of linked models.
- Detach models. The second workflow is to detach models and it is applicable when you work with workshared models. This workflow requires more handling but may take less time. If your model contains links you should detach both the host and linked models. After that, you should re-path links (Reload From) in the host model and make sure that path is set to be Relative instead of Absolute. So the paths will not break and all linked models will be in place.

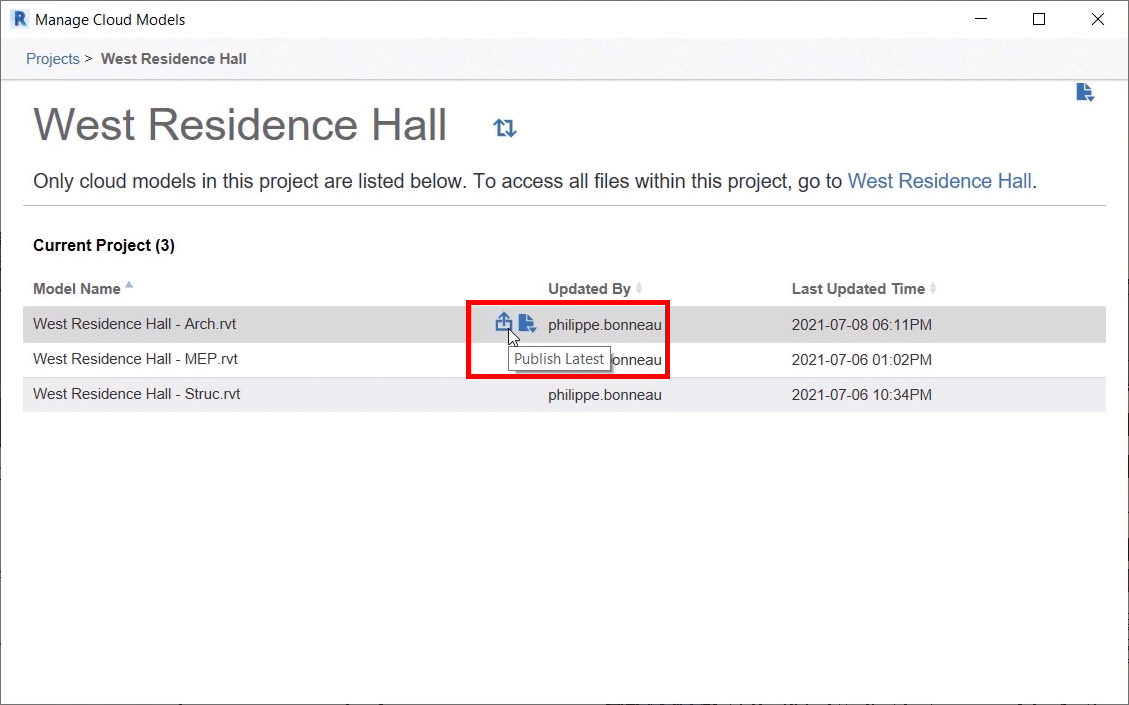
- Send cloud models. There is also a workflow when you send models from BIM Collaborate Pro. At first you can unload Revit links. If you want to bind some links (for example Structure model in the Arch model) then you don’t unload these links. The next step is to publish latest models to the Autodesk Docs. Navigate to Collaborate -> Manage Cloud Models, then select the project, hover over Revit model’s name to reveal its publishing status, and click “Publish Latest”. Finally go to the Autodesk Docs and download model. Optionally, you can bind links (for example Structure model).
 ©Autodesk