If you work on a workshared Revit project you will probably take advantage of worksets. You can compare Revit worksets to layers in AutoCAD or layers in Photoshop but it’s not the best comparison.
Worksets are available only in projects that are workshared. So you need to enable worksharing in order to use them. Revit automatically generates two worksets: “Shared Levels and Grids” (for levels and grids), and “Workset1” (for all remaining elements).
How you can benefit from worksets? Their primary purpose is to enable every member of the project team to work in their own workset. The elements in your models can be distributed in worksets by different criteria: by category, by type, by level, etc. But usually team members work with various elements and it’s difficult to manage worksets. And often modelers don’t pay attention when they add new geometry to put it in the proper workset. Here are some tips that can help you to maximize use of worksets:
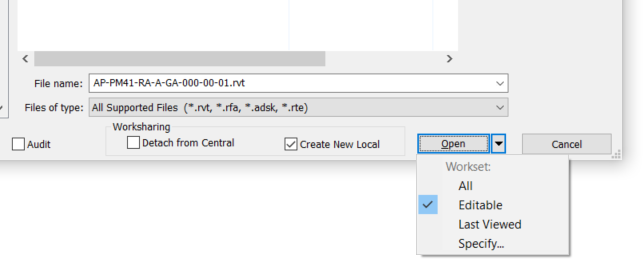
- Put every link in its own workset. Create separate workset for every link of your project. This workflow provides multiple benefits. When you open a Revit project it automatically reloads all of the links. This can take you much time every time you open the project. If these links are in separated worksets you can open the project as “Editable”, then open worksets only for links that you need. You can also open the project with “Specify” option and select the worksets that you need. When you open the necessary worksets you will also need to manually reload these links. This tip refers to both Revit and CAD links, and also to CAD imports. The difference is that you can put all your CAD links/imports into a single workset unlike Revit links where is recommended to put them into separate worksets or maybe combine them. This workflow enables better links management, better file size management, and better overall performance and response time. This workflow also enables you to control visibility of your links globally (in your entire project).
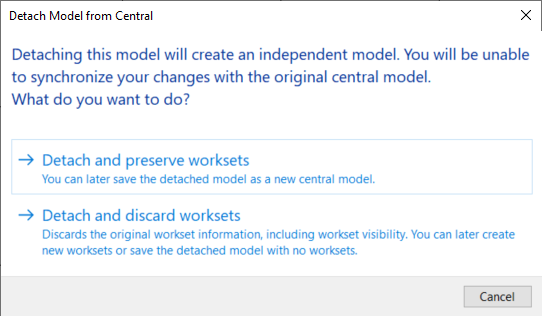
- Preserve worksets. When you want to create detached model from your central model, select “Detach and preserve worksets” option unless you specifically know that you don’t need worksets anymore and that you can discard them.
- Worksharing display settings. Use Worksharing Display tool in your view control bar (below the drawing window) to enable better visibility and control of your workshared project. Set visibility for Ckeckout Status, Owners, Model Updates, and Worksets. Then turn it on/off.
- Put unrelated geometry into separate workset. Maybe you modeled some geometry that you don’t need in your schedules. Put that geometry into a workset, so you can later turn off that workset and prevent the geometry from appearing in schedules.
- Use parameter Workset. Revit doesn’t allow you to use worksets in schedules. The workaround can be to create project parameter called “Workset” (or whatever you want) then use simple Dynamo script to fill that parameter with workset name.
- Improve worksets management with add-ins. You can use TransferSingle to transfer worksets from one Revit model to another model(s); Worksets Management as a free daily assistant in your work with worksets; iSync to automatically relinquish, save and synchronize models; and free FamilyReviser to bulk assign families to specific worksets.